Getting started_ 28
MACHINE'S BASIC SETTINGS
After installation is complete, you may want to set the machine's default
settings. Refer to the next section if you would like to set or change values.
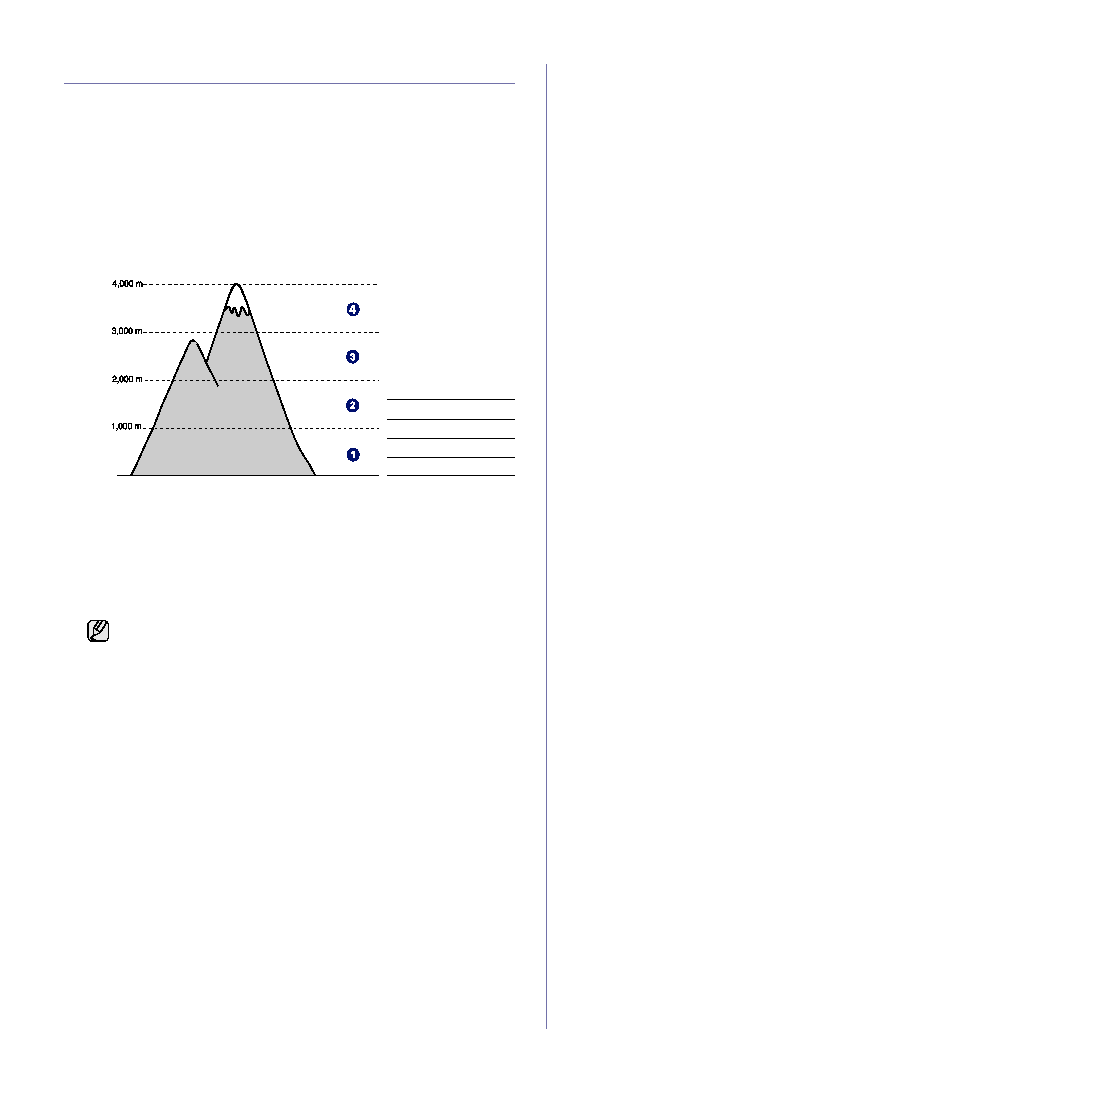
Altitude adjustment
The print quality is affected by atmospheric pressure, which is determined
by the height of the machine above sea level. The following information will
guide you on how to set your machine to the best print quality or best quality
of print.
Before you set the altitude value, find the altitude where you are using the
machine.
1. Ensure that you have installed the printer driver with the provided
Printer Software CD.
2. Double-click the Smart Panel icon on the Windows task bar (or
Notification Area in Linux).
You can also click Smart Panel on the status bar in Mac OS X.
3. Click Printer Setting.
4. Click Setting > Altitude Adjustment. Select the appropriate value from
the dropdown list, and then click Apply.
Changing the display language
To change the language that appears on the control panel, follow these
steps:
1. Press Menu and then OK.
2. Press the left/right arrow until System Setup appears and press OK.
3. Press OK when Machine Setup appears.
4. Press the left/right arrow until Language appears and press OK.
5. Press the left/right arrow until the language you want appears and press
OK.
6. Press Stop/Clear to return to ready mode.
Setting sounds
You can control the following sounds:
•
Key Sound: Turns the key sound on or off. With this option set to On
,
a
tone sounds each time a key is pressed.
•
Alarm Sound: Turns the alarm sound on or off. With this option set to
On
,
an alarm tone sounds when an error occurs.
Key sound, and alarm sound
1. Press Menu and then OK.
2. Press the left/right arrow until System Setup appears and press OK.
3. Press the left/right arrow until Sound/Volume appears and press
OK.
4. Press the left/right arrow until the sound option you want appears
and press OK.
5. Press the left/right arrow until the desired status and press OK.
6. Press Stop/Clear to return to ready mode.
Using the save modes
Power Save mode
Power Save mode allows your machine to reduce power consumption
when it is not in actual use. You can turn this mode on and select a
length of time for which the machine waits after a job is printed before it
switches to a reduced power state.
1. Press Menu and then OK.
2. Press the left/right arrow until System Setup appears and press OK.
3. Press OK when Machine Setup appears.
4. Press the left/right arrow until Power Save appears and press OK.
5. Press the left/right arrow until the time setting you want appears and
press OK.
6. Press Stop/Clear to return to ready mode.
Auto continue
This is the option to set the machine to continue printing or not, in case the
paper size you have set and the paper within the tray mismatches.
1. Press Menu and then OK.
2. Press the left/right arrow until System Setup appears and press OK.
3. Press OK when Machine Setup appears.
4. Press the left/right arrow until Auto Continue appears and press OK.
5. Press the left/right arrow until the binding option you want appears.
•
On: Automatically prints after set time passes, when the paper size
mismatches the tray paper size.
•
Off: Waits until you press Black Start or Color Start on the control
panel, when the paper size mismatches the tray paper size.
6. Press OK to save your selection.
7. Press Stop/Clear to return to ready mode.
1
Normal
2
High 1
3
High 2
4
High 3
If your machine is connected to a network, SyncThru Web
Service screen appears automatically. Click Machine Settings >
Setup (or Machine Setup) > Adj.. Select the appropriate altitude
value, and then click Apply.
0