8
.2
<Maintenance>
4
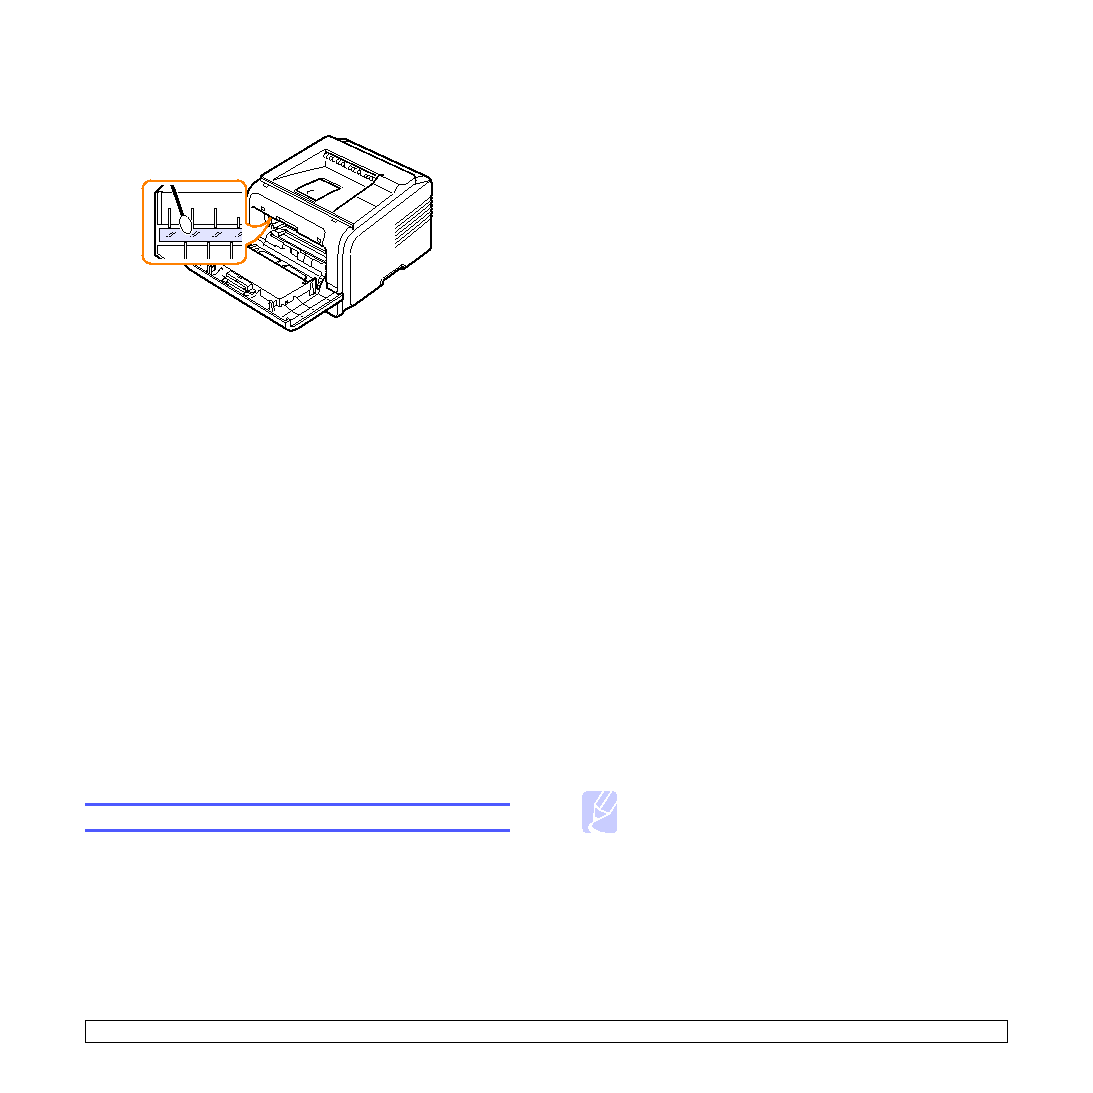
Locate the long strip of glass (LSU) inside the top of the cartridge
compartment, and gently swab the glass with a cotton swab
checking to see if dirt turns the cotton black.
5
Reinsert the
toner cartridge
and close the
front cover
.
6
Plug in the
power cord
and turn the printer on.
Printing a cleaning sheet
If you are experiencing blurred, faded, or smeared printouts, you can
clear the problem by printing a cleaning sheet, provided by your printer.
You can print:
• OPC Cleaning sheet: cleans the OPC drum of the
toner cartridge
.
• Fuser Cleaning sheet: cleans the fuser unit inside the printer.
This process will produce a page with toner debris, which should be
discarded.
1
Make sure that the printer is turned on with paper loaded in the tray.
2
Press
Menu
until
System Setup
appears on the bottom line of the
display and press
OK
.
3
Press the
scroll
buttons until
Maintenance
appears and press
OK
.
4
When
Clean Drum
appears, press
OK
.
Or, press the
scroll
buttons until
Clean Drum
or
Clean Fuser
appears and press
OK
.
Your printer automatically picks up a sheet of paper from the tray
and prints out a cleaning sheet with dust or toner particles on it.
Maintaining the toner cartridge
Toner cartridge storage
To get the most from the
toner cartridge
, keep the following guidelines
in mind:
• Do not remove the
toner cartridge
from its package until ready for use.
• Do not refill the
toner cartridge
. The printer warranty does not cover
damage caused by using a refilled cartridge.
• Store
toner cartridge
in the same environment as the printer.
• To prevent damage to the
toner cartridge
, do not expose it to light for
more than a few minute.
Expected cartridge life
The life of the
toner cartridge
depends on the amount of toner that print
jobs require. When printing text at 5% coverage, the
toner cartridge
lasts an average of either 10,000 or 4,000 pages. (The original
toner
cartridge
supplied with the printer lasts an average of 4,000 pages;
however, it varies depending on the product configuration.) The actual
number may also be different depending on the print density of the
pages you print on, and the number of pages may be affected by
operating environment, printing interval, media type, and media size. If
you print a lot of graphics, you may need to change the cartridge more
often.
Your machine sets the toner remains in 3 levels,
Toner Low
,
Replace
Toner
, and
Toner Exhausted
. The machine is designed to detect the
toner remains and stop printing when the level is
Toner Exhausted
, for
preventing your machine from severe contamination or malfunction.
Refer to page 7.1 for supplies information.
Saving Toner
To save toner, press
Toner Save
on the
control panel
. The button
backlight turns on.
Using this feature extends the life of the
toner cartridge
and reduce
your cost per page, but it also reduces print quality.
Checking the remaining toner
You can check the level of toner left in the cartridge.
If you are having print quality problems, this can help you determine if
the problem is caused by low toner.
1
Press
Menu
until
System Setup
appears on the bottom line of the
display press
OK
.
2
Press the
scroll
buttons until
Maintenance
appears and press
OK
.
3
Press the
scroll
buttons until
Supplies Life
appears and press
OK
.
4
Press the
scroll
buttons to access
Toner Remains
and press
OK
.
The display shows the percentage of the remaining toner.
Note
While the following messages are appearing on the display, the
sub-menu(s) under
Supplies Life
can be changed:
-
Invalid Toner
,
NonGenuine Toner
,
Replace Toner
,
Toner Exhausted