Manual page
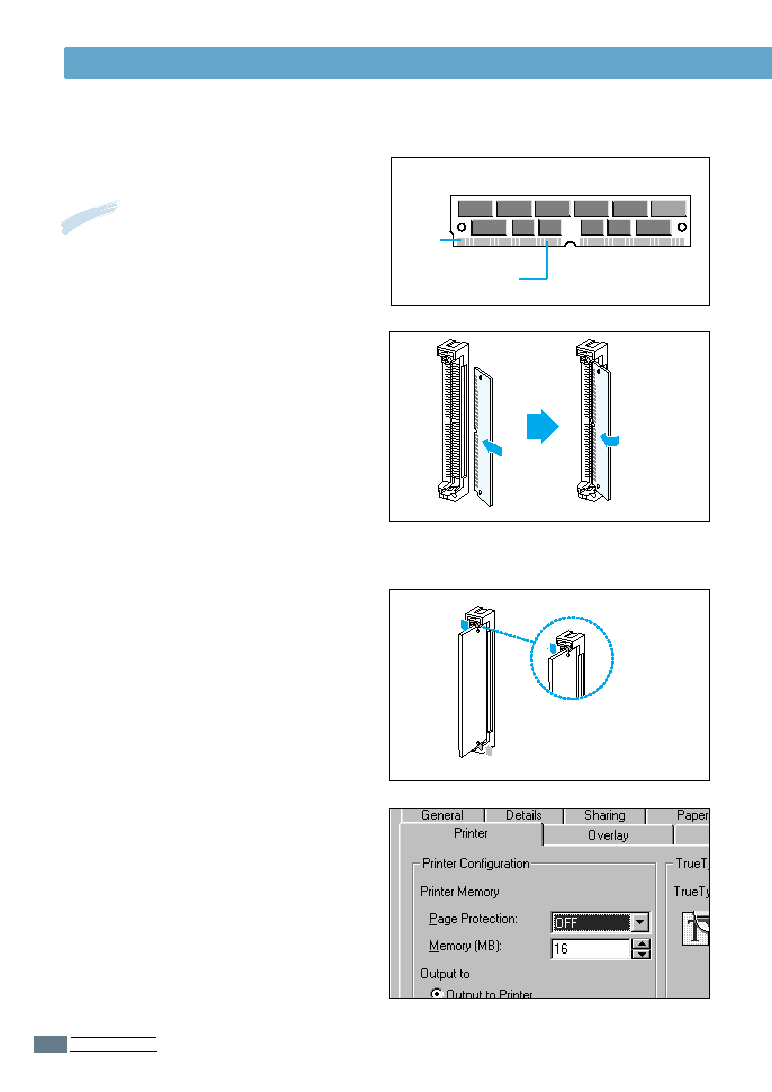
connection points pointing toward
the connector and position the
notch as shown. Insert the
memory option all the way into
the connector at a 30
snaps into place.
connector are fastened, and the
two pins on each of the
connectors are pushed through
the holes on the memory option.
Cover’ on page F.3.
the printer tab of the properties
dialogue box to the value of the
added printer memory.
points along the edge.
Save the packaging.