English-
118
A
P P E N D I X
Installing the Wall Mount Kit (LN-R329D, LN-R409D)
Note: This installation is to be used when attaching the wall mount to a wall.
When attaching to other building materials, please contact your nearest dealer.
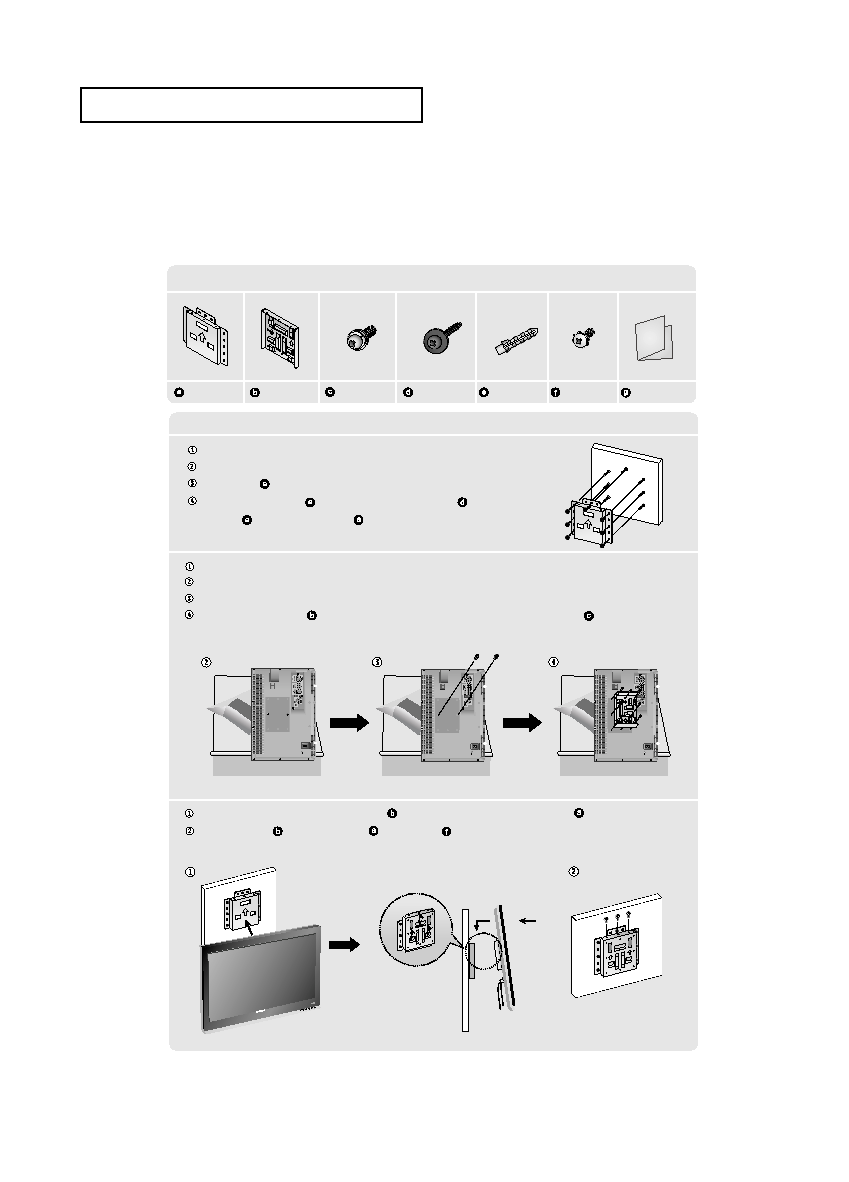
Components (Sold separately)
How to assemble the Wall Mount Bracket
1
Mark the location on the wall where the hole will be drilled.
Make over 35mm-depth-hole on the marked location using drill.
Fix anchors
on each hole on the wall.
Connect wall-bracket
to the wall with wood screws
after fitting
anchors
into the wall-bracket
.
Note: If the bracket is not firmly fixed to the wall, LCD TV can fall off.
2
Turn the power off and unplug the power cord from the outlet.
Place the TV faced down on a soft cloth or cushion on a table.
Loosen two screws on the rear side of the TV set (only model LN-R409D applied).
Attach the set-bracket
onto the rear side of the TV set and secure the screws
.
For 40 inches model, attach the bracket into the two holes with the two screws removed
in step 3 above.
3
Insert three Hangers of the set-bracket
into the grooves of the wall-bracket
.
Fix set-bracket
and wall-bracket
with screws
.
Note: Before installing the set on the wall, connect the cables to the set first.
M4 X L15
M4 X L20
Wall-Bracket
Set-Bracket
Screw: 8EA
Wood Screw: 7EA
Anchor: 7EA
Screw: 3EA
Installation Guide
M4 X L8
(Only Model LN-R409D Applied)
02 BN68-00910A-03Eng.qxd 10/20/05 3:39 PM Page 118